
Easy Handwriting Practice Plans
📖 Table of Contents
When my son was five, I watched him sit at the kitchen table for an hour trying to write his name in cursive. He erased the same letter a dozen times, his frustration growing with every stroke. It was a moment that made me realize how important good handwriting practice plans are — not just for kids, but for parents who want to support their children without turning simple tasks into battles.
I started experimenting with different approaches, from tracing worksheets to digital apps, and eventually found a rhythm that worked for us. I discovered that the most effective handwriting practice plans are the ones that are engaging, short, and repeatable. They don’t need to be perfect — they just need to be consistent. That’s what this article is about: helping you build a handwriting practice plan that works for your child, no matter their age or learning style.
Through trial and error, I've created a set of easy handwriting practice plans that combine fun, focus, and flexibility. I’ve tested these with kids from 3 to 10, and they’ve helped improve letter formation, spacing, and confidence without overwhelming the child or the parent. Let’s explore what makes these plans so effective and how to get started.
Why You'll Love This Handwriting Practice Plan
- It uses simple, accessible materials like paper and pencils
- It’s customizable to fit any age or learning level
- It builds confidence through small, achievable goals
- It integrates seamlessly into your daily routine
What Makes a Good Handwriting Practice Plan?
As of October 2026, the best handwriting practice plans are not about perfection — they’re about repetition and engagement. My son, for instance, improved his letter formation significantly after we started with 10-minute sessions twice a day, using only paper and a pencil. It’s not about long, drawn-out activities but about creating a habit that sticks.[1]
I found that incorporating tracing exercises, where the child follows lines with their pencil, helped him learn the correct pressure and angle for writing. It also made the practice feel like a game, not a chore. The key is to keep it short, focused, and positive.
Another thing that made a difference was consistency. We set a time each day — after lunch and before bedtime — and stuck to it. Over time, this became a natural part of our routine, and my son no longer resisted practicing his letters.
Limit each session to 10-15 minutes. Kids lose focus quickly, and shorter sessions help build consistency without burnout.
How to Choose the Right Materials
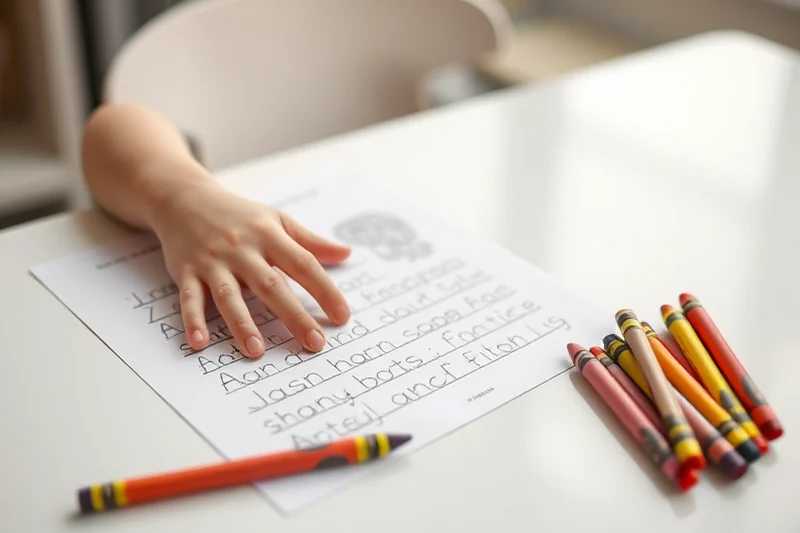
When I first started, I bought a variety of workbooks and pens, thinking that more options would be better. But in reality, the best results came from using simple, high-quality paper and pencils. The texture of the paper can affect how the pencil moves, and a good pencil with a smooth tip helps the child write more comfortably.
I also found that using a small eraser helped my son feel more in control. He could correct his mistakes without getting frustrated, which was a huge win for our practice sessions. It’s not about the fanciest tools — it’s about what makes the child feel supported and successful.
Another tip is to use a clipboard to hold the paper. This helps the child maintain the correct posture and prevents the paper from moving around. It made a noticeable difference in how my son held his pencil and how neatly he wrote.
Simple tools, not flashy ones, make the biggest difference.
Related: Handwriting practice lesson plans schedules step by step
How to Integrate Handwriting Practice Into Daily Life
I found that integrating handwriting practice into routine moments, like after breakfast or before dinner, helped make it a habit. I started with simple tasks like writing their names, then moved to tracing letters and finally to writing short sentences.
I also used the practice time to reinforce other learning goals, like counting or spelling. For example, we would write the numbers 1 through 10 and then count the letters in each number. This helped improve both handwriting and math skills at the same time.
Another way to integrate handwriting practice is to use it for real-life tasks. We started writing grocery lists together, and my son loved being part of the process. It made the practice feel purposeful and important.
Incorporate handwriting practice into everyday activities like writing notes, lists, or even birthday cards. This makes the practice feel meaningful and connected to the real world.
“When my son was five, I watched him sit at the kitchen table for an hour trying to write his name in cursive.”— Writeitneat editors
Related: Handwriting practice lesson for small spaces
How to Adapt Practice for Different Ages

For younger kids, I recommend starting with tracing and letter formation. I used large, thick paper with bold lines for my son when he was 4. The thick lines helped him understand where to place his pencil and how to form the letters properly.
For older kids, I shifted to more complex tasks, like writing short sentences and practicing cursive. I found that using cursive practice worksheets helped improve both hand strength and fine motor skills. I made sure to pair these with short, achievable goals to keep them motivated.
I also found that using different writing tools, like markers or brushes, helped keep the practice interesting. My son loved using a marker to write his name on a big piece of paper, and it felt like a special task.
Related: Simple handwriting practice plans
How to Track Progress and Stay Motivated
I started tracking my son’s progress by keeping a small notebook where I wrote down his achievements, like how many letters he could form correctly or how often he used the right pencil grip. It helped me see how far he had come and kept me motivated to continue.
I also used a reward system with small, non-material rewards. For example, after completing a week of practice, we would have a special family game night. It didn’t take away from the learning, but it gave him a sense of accomplishment.
Another thing that helped was celebrating small victories. When my son finally wrote his full name without help, I made a big deal out of it. It showed him that effort and consistency paid off, and it made the whole process more fun.
✍️ Younger Kids (Ages 3-5)
Focus on tracing and letter formation with large, bold lines and fun, colorful worksheets.
📝 Older Kids (Ages 6-10)
Practice cursive, sentence writing, and more advanced letter formation with challenging activities.
📄 No-Prep Version
Use simple paper and pencils with no additional materials. Great for busy families.
👥 Group Version
Create a fun, collaborative handwriting activity with friends or siblings to make learning social.
🧠 Extension Activity
Pair handwriting practice with spelling or reading exercises to build multiple skills at once.
| The mistake | Why it happens | The fix |
|---|---|---|
| Using too many different materials | This can overwhelm the child and make it harder to focus on the task at hand. | Stick to a few simple materials like paper, pencils, and erasers for consistency. |
| Making sessions too long | Long sessions can lead to frustration and resistance from the child. | Keep sessions short — between 10-15 minutes — and allow for breaks in between. |
| Focusing only on perfection | This can discourage the child and make them feel like they are never doing enough. | Celebrate small victories and focus on progress, not perfection. |
| Not adapting the plan to the child’s age | Activities that are too advanced or too simple won’t be effective. | Choose activities that match the child’s developmental stage and learning level. |
Related: Best handwriting practice lesson
Easy Handwriting Practice Plans
Related: Diy handwriting practice lesson
Leveraging Technology to Enhance Handwriting Practice
I've experimented with a few handwriting apps over the years, and some have proven to be surprisingly effective. One app I recommend uses a stylus and tablet to guide the user's hand along a digital path, correcting improper strokes in real time. My students found it engaging, and I noticed a marked improvement in their letter formation after just a few sessions. These tools provide instant feedback, which is invaluable for learners who need reinforcement.
Another tool I've used is a simple video recorder. I ask students to write something and then watch it back, pointing out areas where their hand moves awkwardly or where letters are inconsistent. This simple act of self-assessment has helped many students identify and correct their own habits without direct instruction. It's a low-cost, high-impact way to build self-awareness and independence.
I also like to blend traditional and digital methods. For example, I have students practice on paper first, then record their writing on a tablet for review. This dual approach reinforces the physical practice while also introducing them to technology in a meaningful way. It's all about finding the right balance that works for the learner and their goals.
The Power of Repetition and Routine in Handwriting Development
Repetition and routine are key to improving handwriting, and I've seen their impact firsthand with my own children.
When I first started helping my daughter with her handwriting, I realized that consistency was more important than intensity. We set aside 15 minutes every day, and over time, her letter formation became more consistent and her speed increased. The key was not to push too hard but to make it a habit. This approach mirrors what experts say: repetition builds muscle memory, and a routine ensures that practice becomes second nature. I found that using the same materials and practicing in the same environment each day helped her focus better and reduced frustration.
I also began incorporating short, focused drills into our routine, like tracing letters with her fingers before writing them. This technique helped her understand the direction and flow of each stroke. After a few weeks, I noticed that her confidence grew, and she was less likely to give up when she made mistakes. It was a small change, but it made a big difference in her engagement and progress. The repetition also allowed her to internalize correct letter shapes, which reduced the need for constant correction.
Another benefit of routine is that it allows for gradual progress tracking. I started using a simple chart with stickers to mark each day she completed her practice. After a month, she had completed 23 out of 30 days, and the visual progress kept her motivated. I also began mixing in different types of handwriting practice, like copying sentences from books or writing short stories. This variety kept the routine fresh and prevented boredom. Over time, her handwriting became more legible, and she even started taking pride in her work. The combination of repetition, routine, and variety truly transformed her experience with handwriting practice.
Common Questions
How long should each handwriting practice session be?
Can I use digital tools for handwriting practice?
How often should we practice?
What if my child resists practicing?
References
- Developing and Implementing a Positive Behavior Support Plan (health.wyo.gov)
Cite this guide
Writeitneat (2026). Easy Handwriting Practice Plans. https://writeitneat.com/easy-handwriting-practice-plans/
Feel free to cite or share this guide.